A few people asked me to share how I motorized my manual SkyTee 2 alt-az mount into a full GoTo system using OnStep. The SkyTee 2 is sold under different brand names, but the mount is always the same. Mine is branded as the Omegon TwinMaster AZ.
Cost Overview
| Component | Cost (approx.) |
|---|---|
| Mount | 350 EUR |
| Tripod | 150 EUR |
| Electronics | 100 EUR |
| Total | ~600 EUR |
The beauty of this modification is that it requires no 3D printer and no custom parts. For around 600 EUR you get a mount that handles a C8 effortlessly. With upgraded clamps and proper balancing, I would put a C9.25 on it without hesitation.
Performance
Visually, the mount is a joy — focus wobble is negligible even at 500x. For astrophotography, it achieves 10 seconds unguided at 1300mm focal length, and with guiding I get 90-second exposures at 1300mm with a 95% keep rate (field rotation becomes the bigger limiting factor at that point). Some example images can be found in my alt-az imaging thread on CloudyNights.
Parts List
- 2× M4×14 screws (plus 2× M4×16 as backup)
- 2× NEMA17 mounting brackets
- 2× NEMA17 motors (200 steps/rotation, 1.5A)
- 2× 16T 6mm GT2 pulleys
- 2× 48T 6mm GT2 pulleys
- 1× 166T 6mm GT2 belt (ALT axis)
- 1× 164T 6mm GT2 belt (AZ axis)
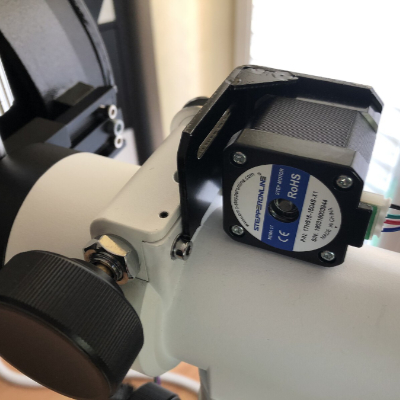
- 1× OnStep controller (MKS Gen L 2.0 with TMC5160 drivers)
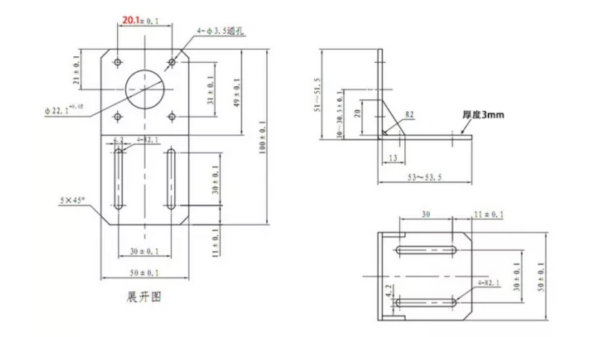
I used mounting brackets with the measurements below:
Mechanical Assembly
The SkyTee 2 has conveniently located mounting screws at the wormgear housings of both the AZ and ALT axes. These can be used to mount NEMA17 motor brackets directly. The screws are M4 — be careful not to strip the threading, as the metal is fairly soft.
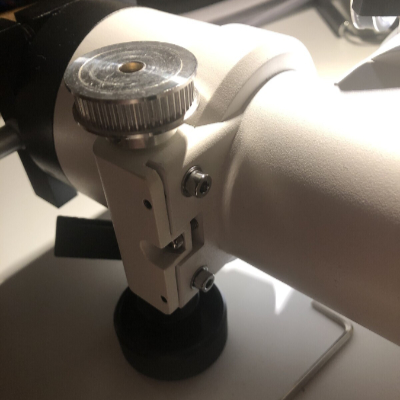
Azimuth Axis
The AZ bracket fits directly and is straightforward to install. I only use one screw to attach it — I was skeptical at first, but 18 months of use has shown it is solid enough. There is very little torque applied during normal operation.
Altitude Axis
The ALT bracket is slightly more involved. The wormgear housing sits closer to the base, so you need to remove the back part of the NEMA17 bracket to make it fit. This is easy to do with a small metal saw.
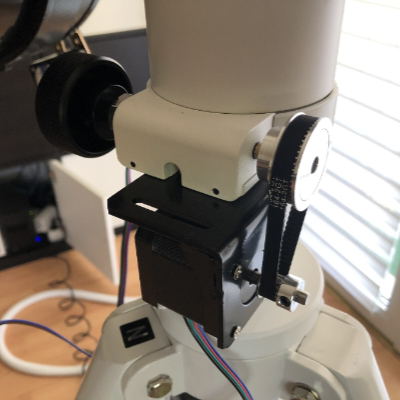
Pulleys and Belts
Remove one slow-motion knob per axis — each is held by a small grub screw and comes off easily once loosened. The 48T pulleys replace the slow-mo knobs, and the 16T pulleys go on the motor shafts, giving a 3:1 reduction. The wormwheel has 144 teeth (identical to the EQ5), resulting in an overall 432:1 mechanical reduction.
Since both axes are slightly different lengths, the required belt lengths differ — 166T for ALT and 164T for AZ. That said, it is worth buying a small variety of lengths since they are inexpensive. Fit the belt onto both pulleys before gently sliding the assembly onto both axis shafts, and align carefully. Belts do not need much tension — being able to press the belt in by 5mm is perfectly fine.
At this point the mechanical part is essentially complete. Opening the clutches or disconnecting the motors from the controller allows you to continue using the mount fully manually.
Electronics and OnStep Configuration
I used an MKS Gen L 2.0 3D printer board with TMC5160 drivers. The TMC5160s are on the pricier side (~10 EUR each on AliExpress) but run cool and quiet. I bought 1.5A motors, which could not be driven reliably by the TMC2130s typically recommended for OnStep. Most OnStep users recommend 400-step, 0.9A motors — these work well with TMC2130s.
Key configuration parameters in OnStep:
- Microsteps for tracking: 32 → 7680 steps per degree
- Motor current (via SPI): 1200mA tracking / 1400mA GoTo
- Microsteps during slews: 8 (improves GoTo speed on the slower MKS Gen L board)
- Base slew rate: 2°/second
The controller runs on 12V. I control it via SkySafari and the built-in OnStep web interface. If you build your own board instead of using the MKS Gen L, you can add an ST4 port for a handcontroller. I also demonstrated a wireless handcontroller solution that has since been merged into the standard OnStep repository — meaning handcontroller support is available even on builds like this one.
Full OnStep documentation and a friendly community can be found at onstep.groups.io.
Final Result
The finished build has the controller neatly attached to the legs of the mount — a compact and clean setup that is easy to transport.